It's Monique here with my second inspiration layout for the Watercolour and Words Challenge. Once again, I had so much fun playing with this set of Dina Wakley Scribble Sticks that the gorgeous Vicki sent me.
I have decided to give you a little tutorial on how to create quite a simple, yet effective layout using mainly stamps, stencils, watercolour techniques and cardstock.
Here is the layout completed:
1. First of all, I created my background. I started by adding some texture paste with the Prima Checker Stencil, found here in the Scrap Matrix shop.
2. Next, I layered on some Lindy's Stamp Gang Sprays, spraying with water to give a watercolour look, and drying between coats to stop them from mixing. I used Blue Hawaiian Blue, Bachelor Button Blue, and Caribbean Blue. Next, I used some embossing glue and added some white embossing powder - just randomly on my page. Finally, I added some stencilling with an Alphabet stencil, and some Colour Blast Colour Paste in Stormy Weather, and did some random stamping with the star stamp from the 7 Dots Studio, Homegrown Clear Stamp Set.
Here is a close up on the background. Note I also went in and shaded some of the texture paste squares with a black scribble stick - I simple dipped it in water and applied the colour - it's like adding a creamy paint, but it is watercolour. Easy.
3. I then moved onto my stamped embellishments. I simply stamped images onto cardstock. Use some Archival Ink to ensure the image stays colourfast. I used stars, but there are some awesome stamps available in the Scrap Matrix shop.
Stamps such as this Dina Wakley Abstract Bloom one:
Or this Blue Fern Texture Circles stamp.
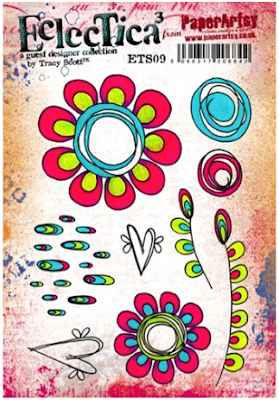
Or this Paper Artsy Stamp
The choice is yours really - you could pick anything that suits your layout.
4. Once I stamped the images, I used the scribble sticks to apply colour - again simply dipping the sticks in water to activate the colour. I am so in love with the Scribble Sticks - they make applying colour so easy! I then restamped the images over the colour, and cut all the images out, finally backing them in black cardstock to help make them "pop."
Here is what they looked like before I added them to the layout:
5. I then put the whole layout together. I added a little extra to my background by using these fabulous Tim Holtz label letters.
That's it from me for now. Don't forget, you have about a week to do your Watercolour and Words challenge. Once you've finished your layout, simply up load your creation into the correct folder on the Scrap Matrix Shares page on Facebook. There are some fabulous prizes up for grabs so come on - give it a go!!
Until next time - happy creating!


I love the stamp choices you have highlighted to give the whole layout a totally different look! Awesome layout Monique! xx
ReplyDelete